Overview
Overwatch includes built-in performance stats that let you show your FPS and network latency directly on the screen while you play. This is the easiest way to check whether stuttering, lag, or delayed hit registration is caused by your PC performance or your connection.
The steps below apply mainly to Overwatch 2 on PC, though similar options may appear on console depending on the platform and display mode.
How to Show FPS and Ping in Overwatch
The main method is to enable Overwatch’s in-game performance overlay from the Video settings. Once enabled, your FPS and latency will appear during matches, in the Practice Range, and in other gameplay modes.
Step 1: Open the Options Menu
Launch Overwatch and wait until you reach the main menu. Press Esc on PC, then select Options. You can also click the menu icon and open Options from there.
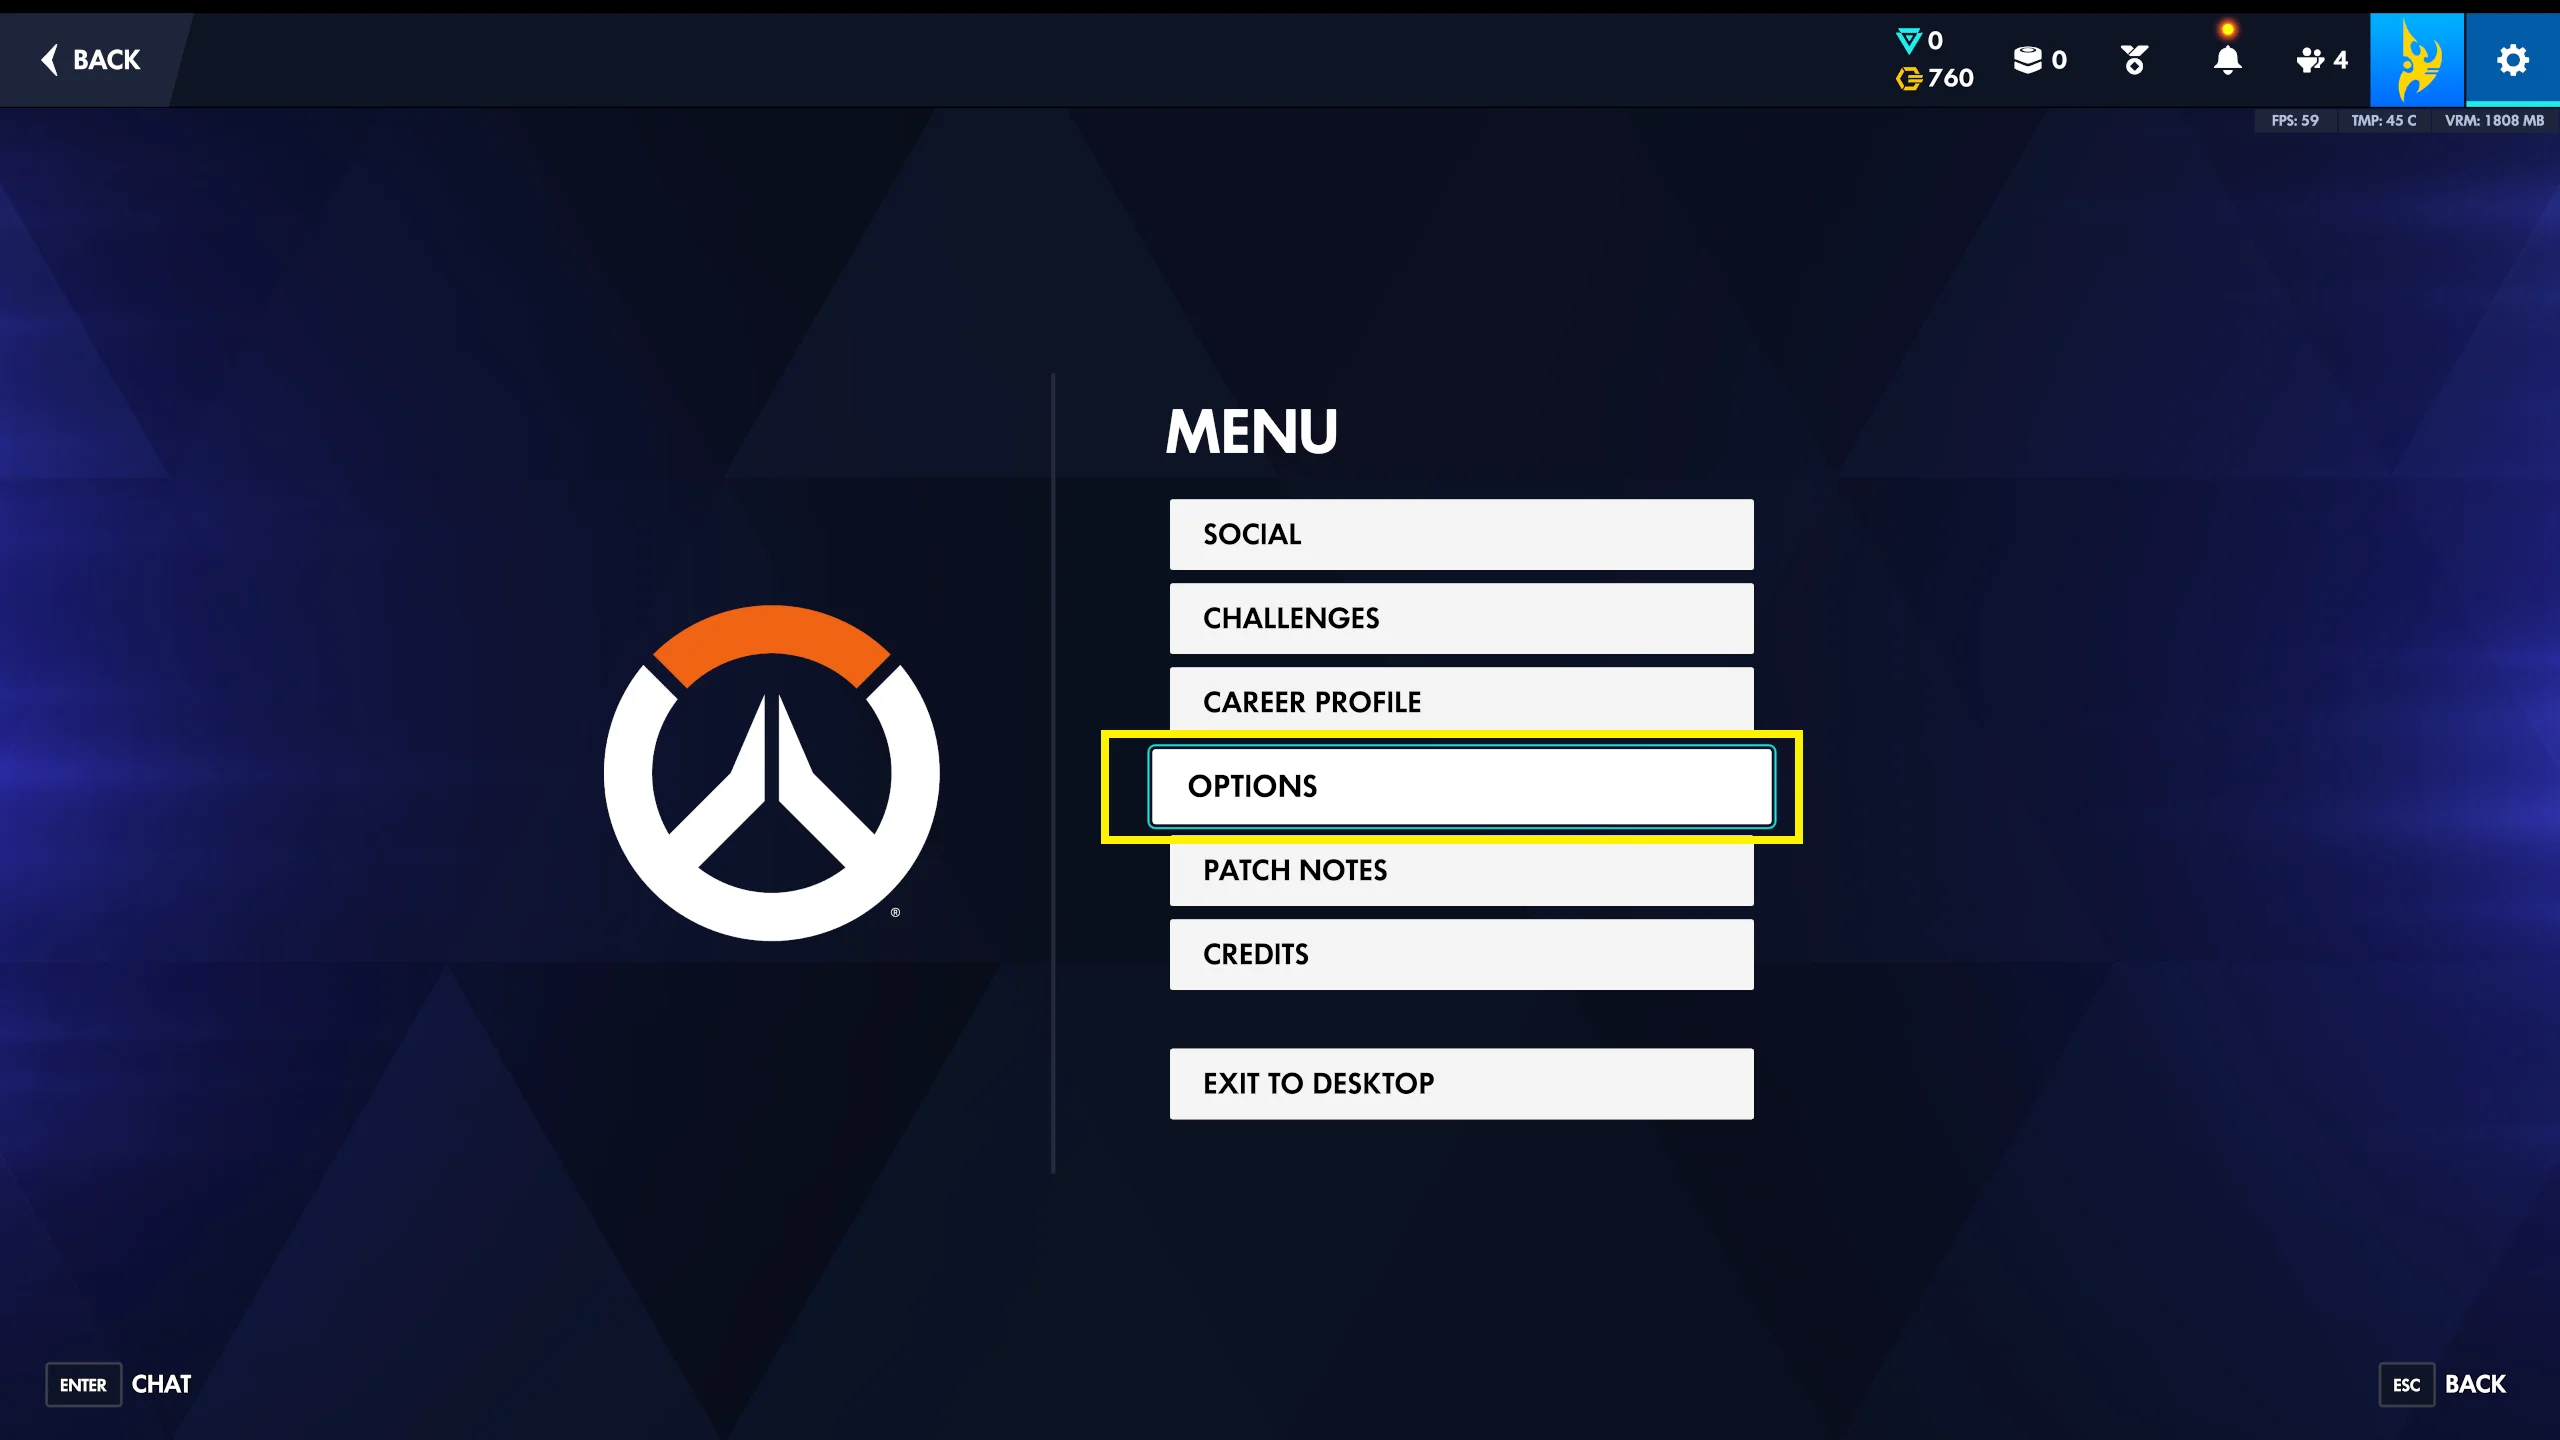
If you are already in a match, you can still open the menu, but it is usually easier to change these settings from the main menu or Practice Range.
Step 2: Go to the Video Settings
Inside the Options menu, select the Video tab and then select the Details tab. This is where Overwatch stores display, graphics, and performance overlay settings.

Look for the section called Details. In some versions of the game, the performance options may appear under an expandable area named Advanced Performance Stats.
Step 3: Enable Display Performance Stats
Find Display Performance Stats and set it to On. This activates the performance overlay system, but you may still need to choose which specific stats you want to show.
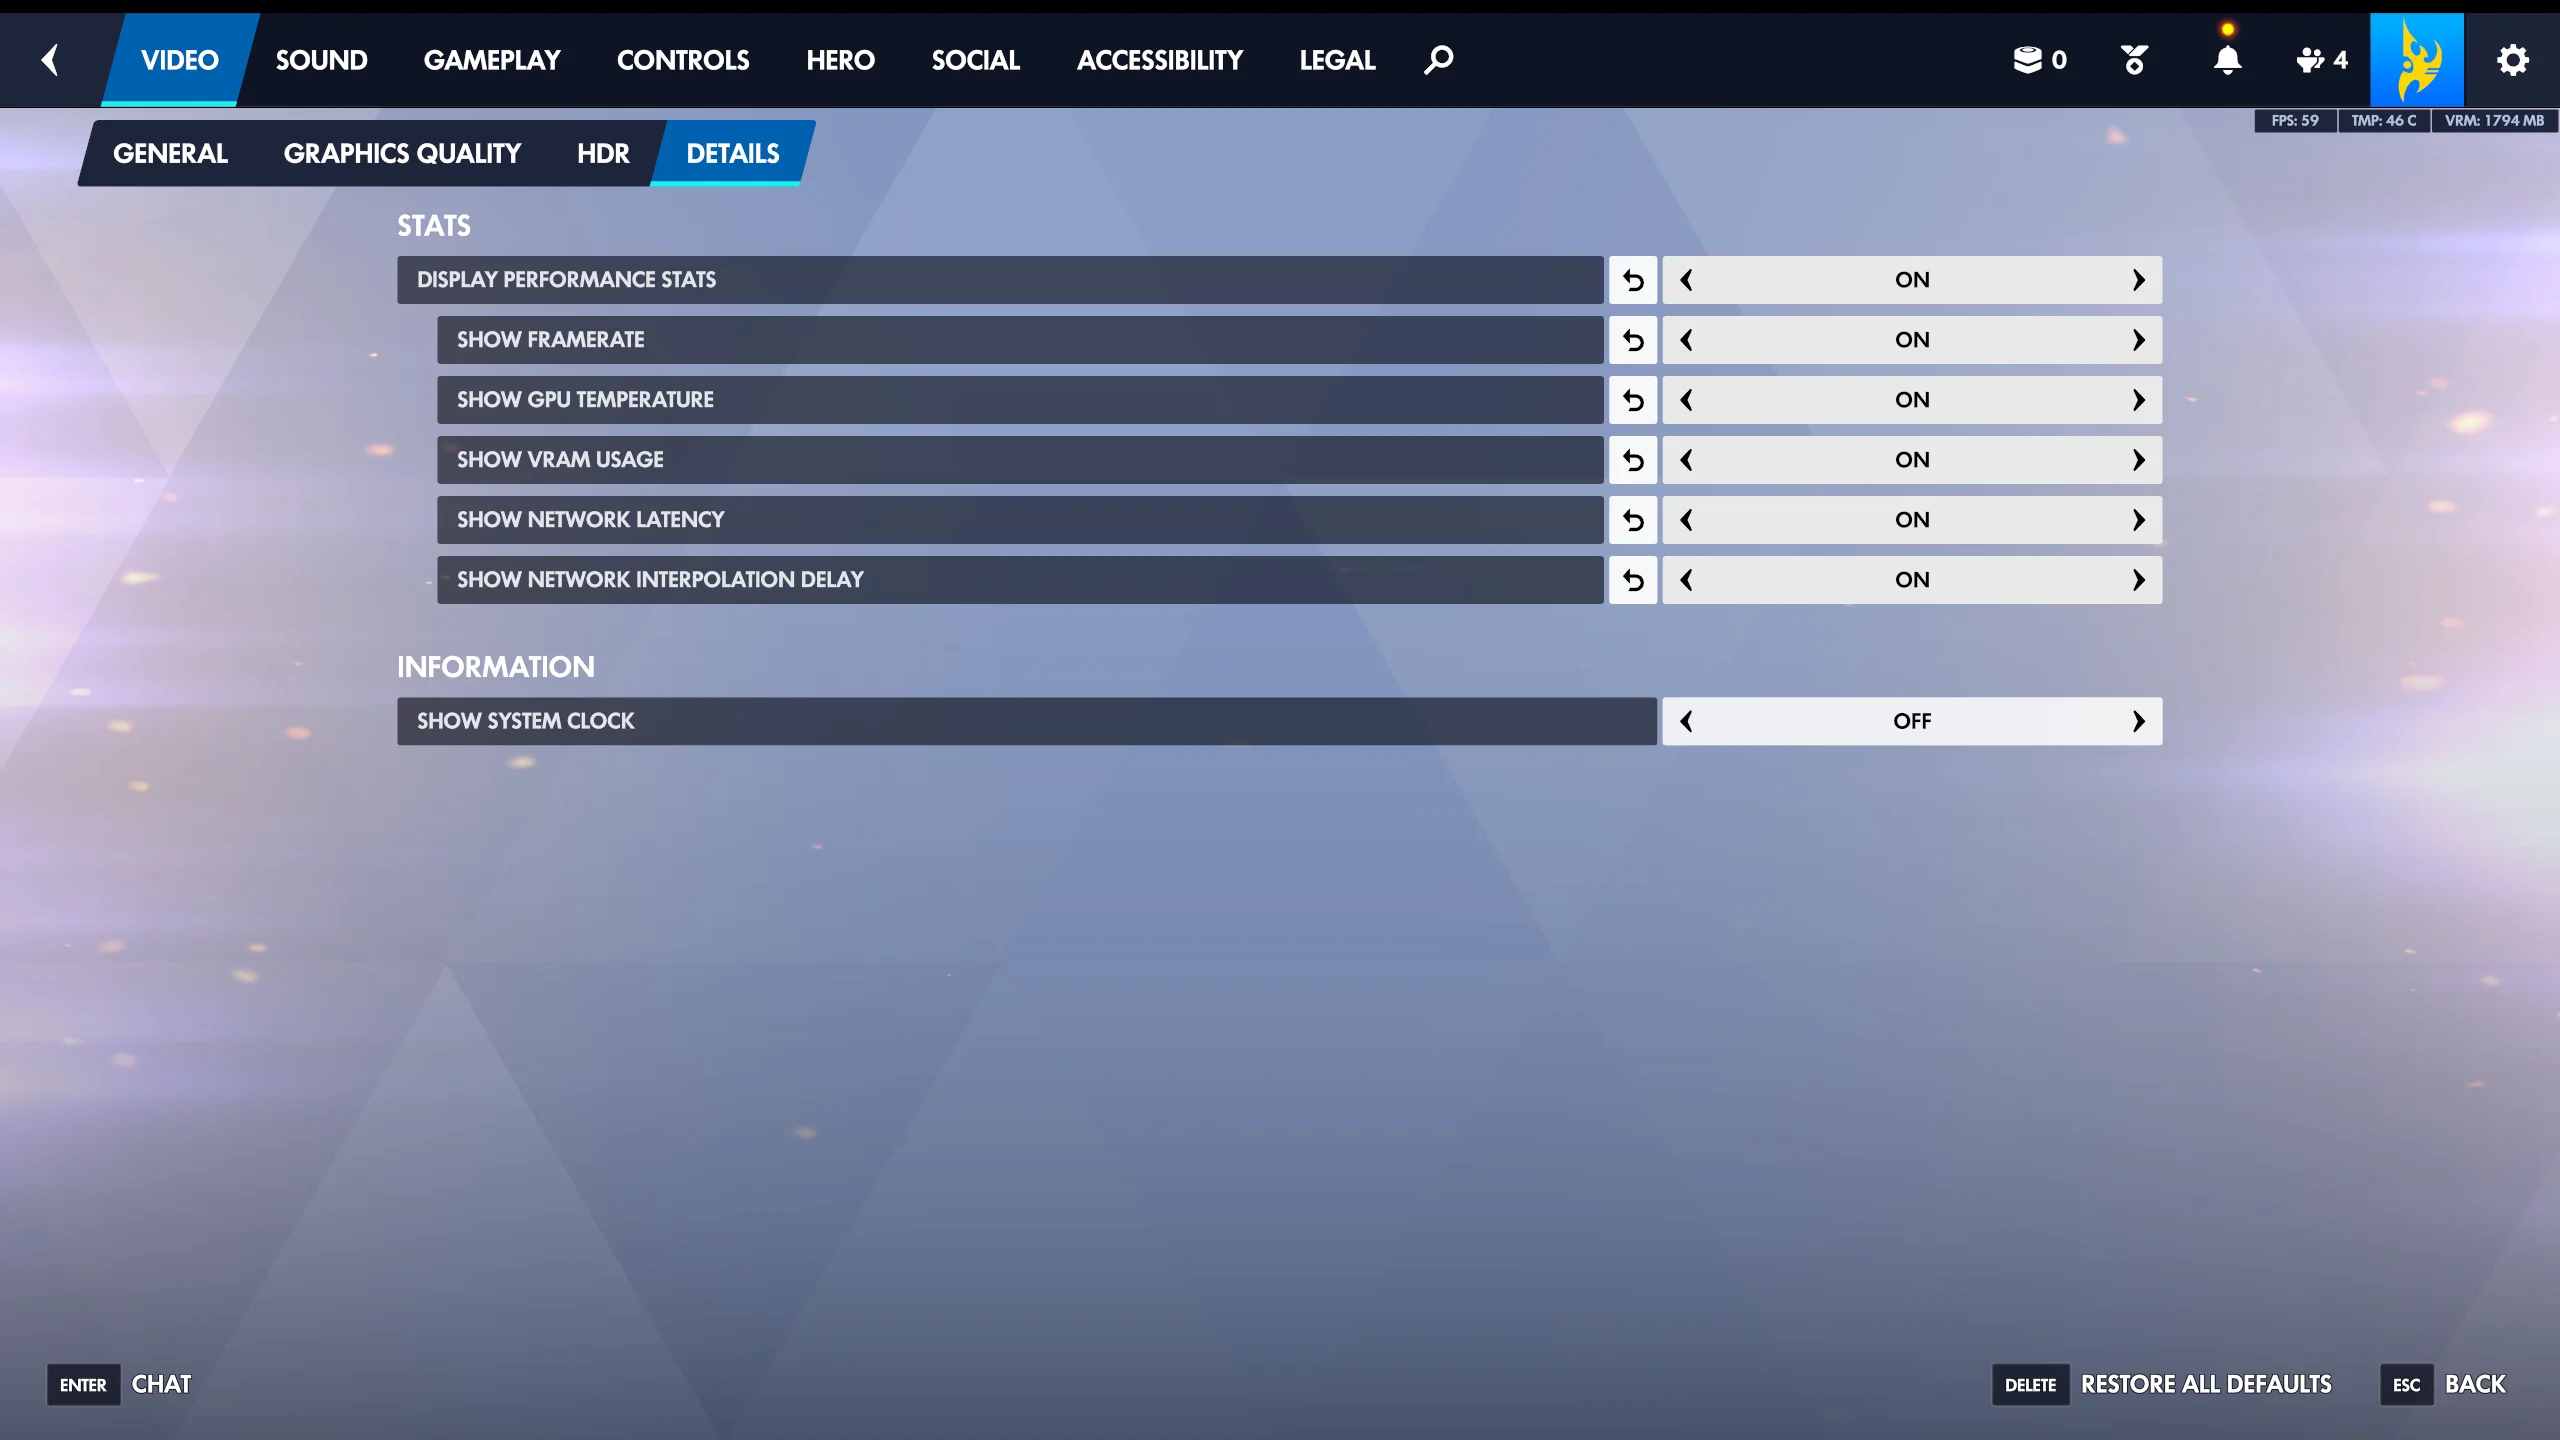
Step 4: Turn On Framerate and Network Latency
Enable Show Framerate to display your FPS. This tells you how many frames per second the game is rendering. Higher FPS usually means smoother gameplay, especially on high-refresh-rate monitors.
Next, enable Show Network Latency. This displays your latency, commonly called ping. Lower latency is better; high latency can cause delayed actions, rubber-banding, or shots that feel like they are not registering correctly. Still from here, you can decide to show the following stats:
- GPU temperatur
- VRAM usage
- Network interpolation delay
Step 5: Apply the Settings and Test In-Game
Click Apply if prompted, then enter the Practice Range or a match. Your FPS and latency should now appear on your screen, usually near the top-right corner.
If you do not see the stats, return to Options -> Video -> Details and confirm that Display Performance Stats, Show Framerate, and Show Network Latency are all enabled.
Optional: Use the Network Graph Shortcut
On PC, you can also press Ctrl + Shift + N to open Overwatch’s detailed network graph. This view is more technical and is mainly useful for diagnosing packet loss, latency spikes, and server connection issues.
Press the same shortcut again to hide the graph when you are done.
Conclusion
To display FPS and ping in Overwatch, open Options -> Video -> Details, turn on Display Performance Stats, then enable Show Framerate and Show Network Latency. Once enabled, these stats help you quickly tell whether performance problems are coming from low FPS, high ping, or unstable network conditions.
